Installing a picture frame spacer to best eliminate gaps at the corners is an acquired skill. When you order a spacer cut to fit, we miter it to fit inside the rabbet with a very small allowance.
To ensure your spacer stays tight to the frame we recommend the following attachment method
- Place a few 1-2″ long strips of ATG along the piece
- Add drops of white or yellow glue between the ATG
- Press into place
The ATG holds the strip until the glue dries. ATG will eventually fail, but you will have the real glue still holding it in place.
To make tight corners we suggest the following procedure (see diagrams below):
The problem is that no matter how tight the tolerance is, it’s almost impossible to completely eliminate a gap at the corner.
-
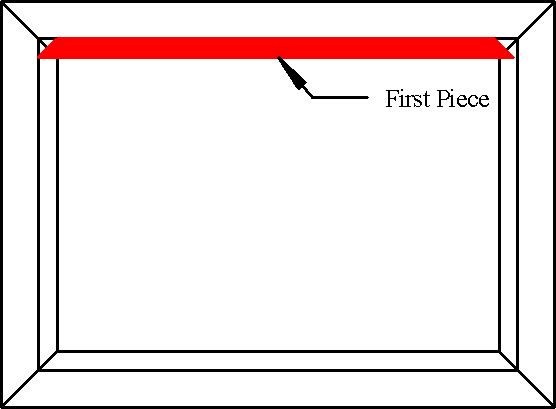
- Put the first piece of spacer in backwards; this piece can be up to about 1/8″ undersize
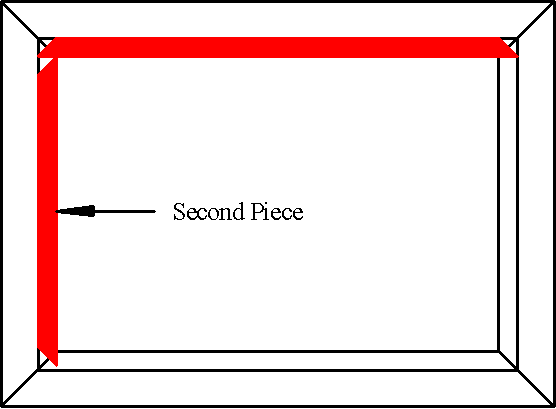
- Now trim the second piece so it is ¼” shorter than the frame dimension and put it in backwards, ensuring that the point is pressing tight against the first piece of spacer; this piece can also be up to about 1/8″ undersize
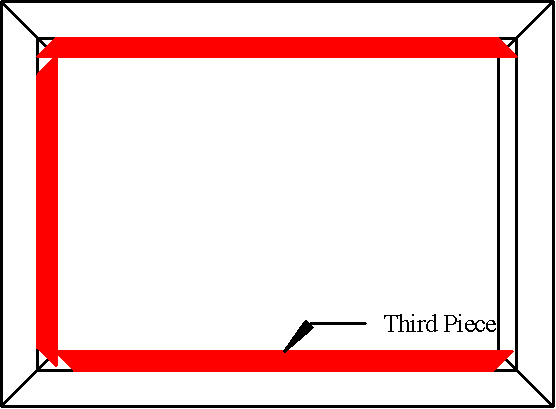
- Repeat step 2 on the third piece
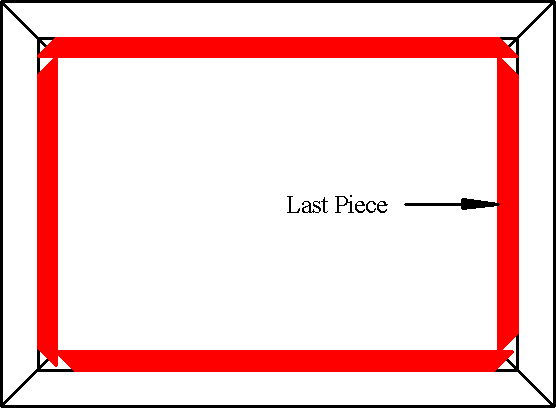
- For the last piece you will finally have to make a precise cut, so that it fits tightly in between pieces 1 and 3. However, since there are points on both ends it can be a whisker (that’s a technical term that means a very small amount) long and you will still be able to force it snugly in
If ordering cut-to-size spacer with your chop or frame, you will need to order it “cut long.” This is because only one side of spacer has a finish on it and we expect you to install it conventionally. If we cut it long you will have enough length to re-cut the miters in reverse.
How to Install a Frame Spacer: